Introduction
Soldering is a crucial skill when working with LED lighting projects, as it allows you to connect wires and components securely. When done correctly, it is a simple process that can create a strong and long-lasting connection. This guide will walk you through how to solder LED lights, including the tools and materials you will need, safety precautions to take, and tips for advanced techniques.
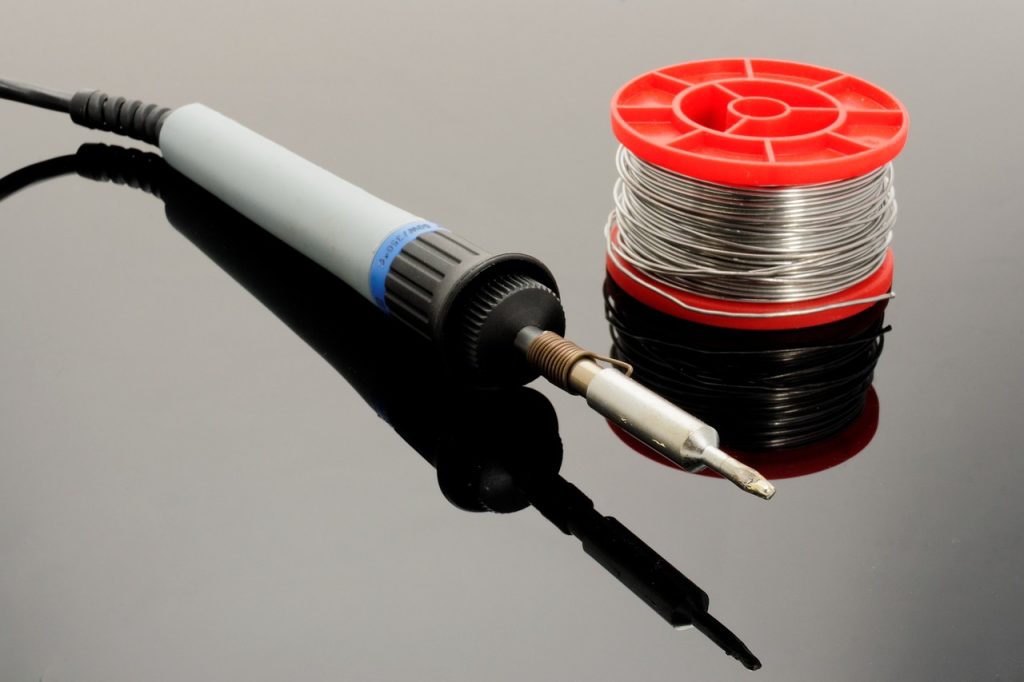
Before you get started, it’s important to gather all of the necessary tools and materials. You will need a soldering iron, solder, wire stripper, and LED lights. It’s also a good idea to have a helping hand, tweezers, and a heat sink to assist with the soldering process. You will also want to test your led light strip, because if the light is broken… there is no point in soldering it right?
The overview of the steps
Safety is a top priority when soldering, so take the proper precautions. Wear protective eyewear to avoid any hot solder or sparks from the soldering iron from getting in your eyes. It’s also a good idea to work in a well-ventilated area to dissipate any harmful fumes emitted during the soldering process. We will go over the high level steps that need to be taken to get your soldering job done, then look in depth at each of them to find out exactly what is needed in each stage.
Once you have all your tools and materials ready and take the necessary safety precautions, it’s time to start preparing to solder. This includes setting up your workstation and properly stripping and tinning the wires. With the right preparation, you can ensure a successful soldering process.
In the next section, we will dive deeper into how to solder LED lights, including positioning the LED and wires, applying heat and solder to the joint, and finishing and testing the connection. We will also provide advanced tips and tricks for fixing cold solder joints, soldering in difficult to reach spaces, and working with different types of LED lights.
By the end of this guide, you will have a solid understanding of how to solder LED lights and be able to take on your own LED lighting projects confidently. So let’s get started!
Preparing to Solder – the build-up
Before you begin soldering, it’s important to prepare the LED lights and wires properly. This will help ensure that the soldering process goes smoothly and creates a strong and reliable connection.
First, you will need to strip the insulation off of the wires. This can be done using a wire stripper, a tool specifically designed for this purpose. Simply clamp the wire stripper around the wire, making sure to leave a small amount of insulation on end, and then gently pull the wire through the stripper to remove the insulation.
Once the wires are stripped, you will need to tin them. Tinning involves applying a small amount of solder to the stripped wire to help create a better connection with the LED. To do this, heat the wire with the soldering iron and then touch the tip of the soldering iron to the wire until the solder flows onto the wire and covers it evenly. Make sure not to apply too much solder, as this can create a blob on the wire, making it difficult to connect to the LED.
Using a helping hand or tweezers to hold the LED in place while soldering is also a good idea. This will allow you to have both hands free to work on the soldering process, making it easier and more precise.
Once you have stripped and tinned the wires, you can begin soldering the LED lights.
Soldering the LED Lights – the main event
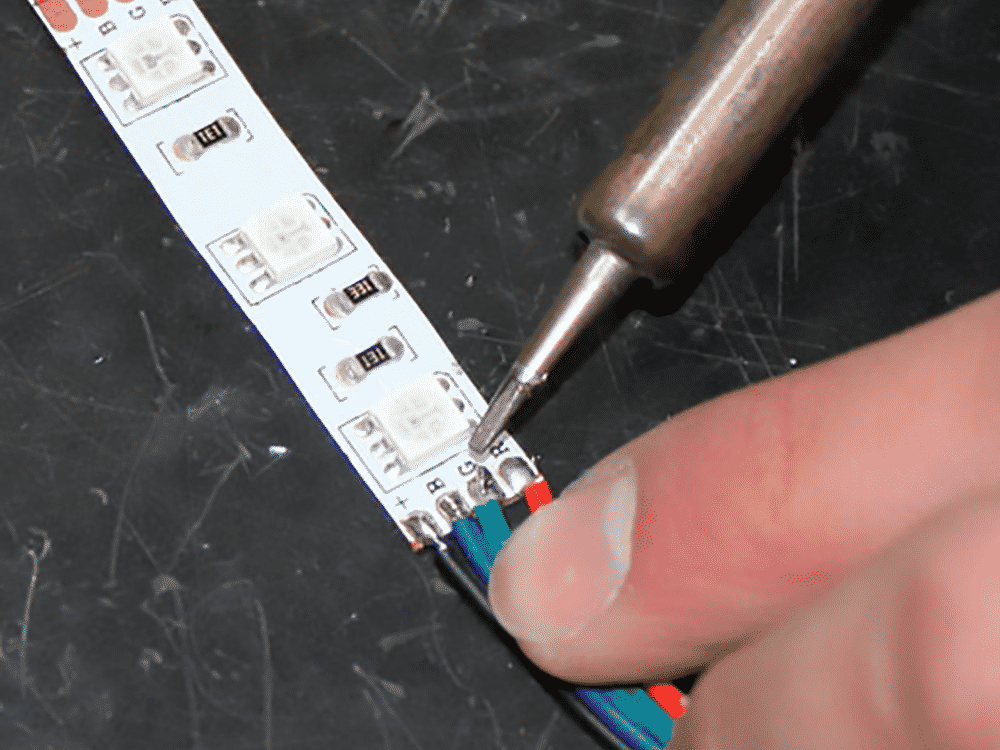
The first step in soldering the LED lights is positioning the LED and wires. Hold the LED in place with the helping hand or tweezers, and make sure the wires are aligned with the appropriate connections on the LED. It’s important to ensure the wires are positioned correctly before applying any heat or solder, as it can be difficult to reposition the wires once they are soldered.
Next, it’s time to apply heat and solder to the joint. Place the soldering iron tip on the connection point and hold it there for a few seconds to heat up the wire and LED. Once the connection is hot enough, touch the solder to the joint, covering the wire and the connection point on the LED evenly. It’s important to use enough solder to create a strong connection but not so much that it creates a blob or short circuit.
Once the solder has cooled and hardened, you can finish and test the connection. Gently tug on the wires to make sure they are secure and then test the LED by connecting it to a power source. If the LED lights up, you have successfully soldered the connection. If it doesn’t, you may need to check the connection and ensure that it is secure and that there are no broken wires or other issues.
With these steps, you should know how to sell LED lights and create a strong and reliable connection. The next section will cover some advanced tips and tricks for working with LED lights and troubleshooting common issues.
Advanced Tips and Tricks – for those taking their soldering game to the next level!
As you become more comfortable with soldering LED lights, you may want to try some advanced techniques to take your projects to the next level. Here are a few tips and tricks to help you get started:
- Fixing a cold solder joint: A cold solder joint is a weak connection that can occur when the solder does not properly flow and bond to the wire and LED. This can be caused by not applying enough heat or not using enough solder. To fix a cold solder joint, you must reheat the connection and add more. Simply place the soldering iron tip on the joint and hold it there for a few seconds to heat up the connection. Then, add more solder to the joint, covering the wire and the connection point on the LED evenly.
- Soldering in difficult-to-reach spaces: LED lights can sometimes be difficult to solder in hard-to-reach spaces, such as on the back of a circuit board. In these cases, you may need a soldering iron with a thin tip or a soldering pencil to get into tight spaces. It’s also a good idea to use tweezers or a helping hand to hold the LED in place while soldering.
- Tips for working with different types of LED lights: There are many different types of LED lights, including surface mount LED lights, flexible LED strips, and more. Each type of LED light may require a slightly different soldering technique. For surface-mount LED lights, for example, you may need to use a soldering iron with a small tip to reach the connections on the back of the LED. For flexible LED strips, you may need to be careful not to apply too much heat or pressure to the strip, as it may be more fragile than other types of LED lights.
By keeping these advanced tips and tricks in mind, you can take on more challenging LED lighting projects and get the most out of your soldering skills.
Conclusion: Mastering the Art of Soldering LED Lights – the post-game
Congratulations, you now know how to solder LED lights! This guide covered the steps for preparing to solder, including gathering the necessary tools and materials and taking safety precautions. We then walked you through the process of soldering the LED lights, including positioning the LED and wires, applying heat and solder to the joint, and finishing and testing the connection.
We also provided some advanced tips and tricks for fixing cold solder joints, soldering in difficult-to-reach spaces, and working with different types of LED lights. By keeping these tips in mind, you can take on more challenging LED lighting projects and get the most out of your soldering skills.
It’s important to remember that soldering is an important skill to have when working with LED lighting projects. A well-soldered connection will ensure that your LED lights are securely connected and will provide long-lasting performance. You can confidently tackle any LED lighting project with the right knowledge and techniques.
If you run into any issues or have questions about the soldering process, many resources are available to help you troubleshoot. Check out online forums or reach out to a professional for assistance. With the right guidance and a little practice, you will be well on your way to becoming a pro at soldering LED lights.
Frequently Asked Questions
What is soldering and why is it important in LED lighting projects?
Soldering is the process of using a soldering iron and solder to create a permanent electrical connection between two or more components, such as wires and LED lights. It is an important skill when working with LED lighting projects because it allows you to securely connect the components, ensuring that your LED lights will function properly and have a long lifespan.
What tools and materials do I need for soldering LED lights?
To solder LED lights, you will need a soldering iron, solder, wire stripper, and LED lights. It’s also a good idea to have a helping hand, tweezers, and a heat sink to assist with the soldering process. Use the right tools and materials for the job to ensure a successful soldering process.
What safety precautions should I take before soldering LED lights?
Soldering can be dangerous if not done properly, so it’s important to take the necessary safety precautions. Wear protective eyewear to avoid any hot solder or sparks from the soldering iron from getting in your eyes. It’s also a good idea to work in a well-ventilated area to dissipate any harmful fumes emitted during the soldering process. Make sure to follow the safety guidelines for your specific tools and materials.
How do I fix a cold solder joint?
A cold solder joint is a weak connection that can occur when the solder does not properly flow and bond to the wire and LED. To fix a cold solder joint, you need to reheat the connection and add more. Simply place the soldering iron tip on the joint and hold it there for a few seconds to heat up the connection. Then, add more solder to the joint, covering the wire and the connection point on the LED evenly.
How do I solder LED lights in difficult-to-reach spaces?
LED lights can sometimes be difficult to solder if they are in hard-to-reach spaces, such as on the back of a circuit board. In these cases, you may need a soldering iron with a thin tip or a soldering pencil to get into tight spaces. It’s also a good idea to use tweezers or a helping hand to hold the LED in place while soldering. With the right tools and techniques, you can successfully solder LED lights in even the most difficult-to-reach spaces.