Introduction to LED light DIY projects
LED lights have become a popular choice for both residential and commercial lighting due to their energy efficiency, long lifespan, and versatility. In addition to being used as traditional light sources, LED lights are also frequently used in DIY projects for their ability to provide bright, customizable lighting. In this guide, we will cover everything you need to know about using LED lights for DIY projects, including choosing the right LED lights, gathering the necessary tools and materials, taking safety precautions, and installing and maintaining the lights.
Before diving into the details, it’s important to understand the basics of LED lights. LED stands for “light-emitting diode,” and these lights work by using a small semiconductor to convert electricity into light. One of the main benefits of LED lights is their energy efficiency, as they use up to 85% less energy than traditional incandescent bulbs and last up to 25 times longer. LED lights also offer a wide range of color temperatures and beam angles, making them suitable for a variety of applications.
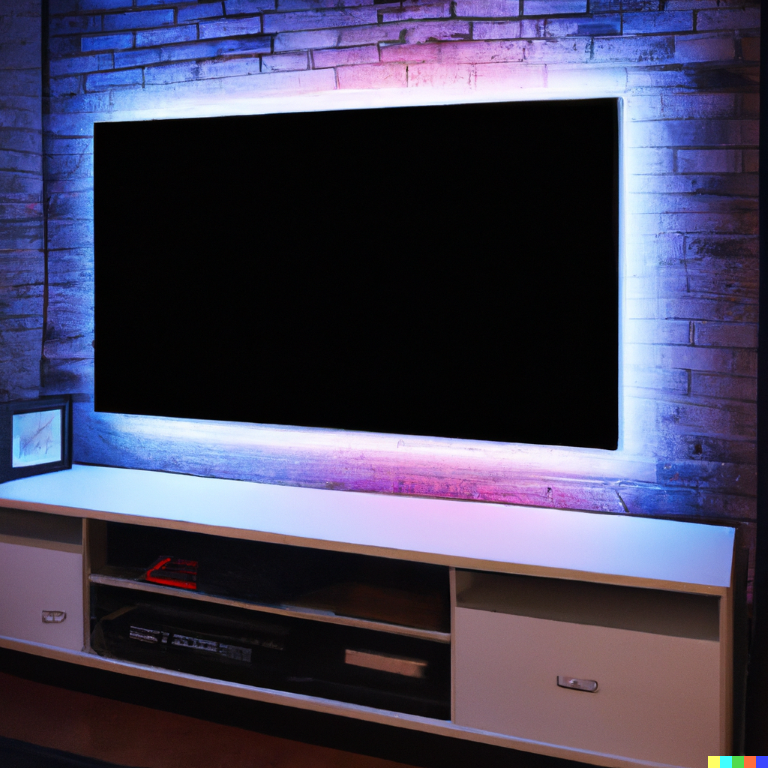
When it comes to using LED lights for DIY projects, the possibilities are endless. LED lights can be used to create unique lighting effects, highlight certain features or objects, or simply add a touch of ambiance to a space. In this guide, we will provide step-by-step instructions for installing LED lights in a variety of DIY projects, as well as tips for troubleshooting common issues that may arise during the process. We will also discuss the importance of following safety precautions and maintaining the LED lights to ensure they last for as long as possible. Whether you are a seasoned DIY enthusiast or new to the world of LED lights, this guide will provide all the information you need to get started on your next project.
Choosing the Right LED Lights
Before starting any DIY project involving LED lights, it’s important to choose the right lights for the job. There are several factors to consider when selecting LED lights for your project, including brightness, color temperature, and beam angle.
Brightness
One of the key considerations when choosing LED lights is the brightness level. LED lights are measured in lumens, with higher lumens indicating a brighter light. For example, a light with 100 lumens would be dimmer than a light with 1000 lumens. When selecting LED lights for a DIY project, consider the size of the space and the intended use of the lights. For example, a small closet might only require a low-lumen LED light, while a larger living room might benefit from a brighter LED light.
Color Temperature
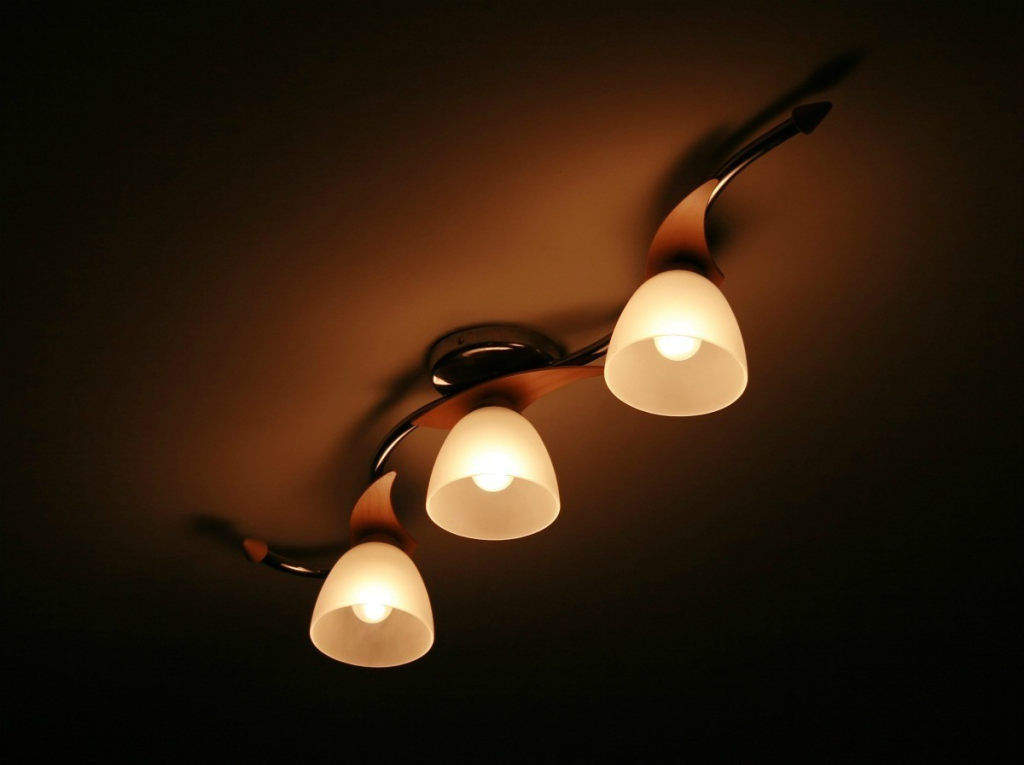
Another factor to consider when choosing LED lights is the color temperature, which refers to the appearance of the light on a scale from warm to cool. Warm light has a yellow or orange hue, while cool light has a bluish hue. The color temperature of LED lights is measured in kelvins (K), with lower kelvin values indicating a warmer light and higher kelvin values indicating a cooler light. For example, a light with a color temperature of 2700K would be considered warm, while a light with a color temperature of 6500K would be considered cool. When selecting LED lights for a DIY project, consider the intended mood and atmosphere of the space. For example, a warm light might be suitable for a cozy bedroom, while a cool light might be better suited for a modern kitchen.
Beam Angle
The beam angle of an LED light refers to the width of the light beam it produces. LED lights are available in a range of beam angles, from narrow to wide. When selecting LED lights for a DIY project, consider the size and shape of the space and the intended use of the lights. For example, a narrow beam angle might be suitable for accent lighting, while a wide beam angle might be better for general illumination.
By taking these factors into consideration, you can choose the best LED lights for your DIY project and ensure that you have the right level of brightness, color temperature, and beam angle for your needs.
Tools and Materials
Before starting any DIY project involving LED lights, it’s important to gather the necessary tools and materials. Having the right tools and materials on hand will make the installation process smoother and more efficient, and will help ensure that the project is successful.
Here is a list of tools and materials that you may need for a DIY LED light project:
- Soldering iron: A soldering iron is used to join electrical components together using a type of metal called solder. If you are installing LED lights that require soldering, you will need a soldering iron and some solder.
- Wire stripper: A wire stripper is a tool used to remove the insulation from the ends of electrical wires. When installing LED lights, you may need to strip the wires to expose the bare wire in order to make a connection.
- Heat shrink tubing: Heat shrink tubing is a type of plastic tubing that is used to insulate and protect electrical connections. When heated, the tubing shrinks and conforms to the shape of the wires, creating a secure and watertight connection.
- Screwdriver: Depending on the type of LED lights you are installing, you may need a screwdriver to secure them in place.
- Electrical tape: Electrical tape is used to insulate and protect electrical connections. It is a good idea to have some on hand in case you need to make any temporary or emergency repairs.
- Wire nuts: Wire nuts are used to connect two or more wires together. They are a quick and easy way to make electrical connections without the need for soldering.
In addition to these tools, you will also need the LED lights themselves, as well as any other materials that are specific to your project, such as mounting brackets or power supplies.
With the right tools and materials on hand, you can ensure that your DIY LED light project goes smoothly and is a success.
Safety Precautions
Working with electrical components can be dangerous if proper precautions are not taken. When installing LED lights, it is important to follow proper safety procedures to avoid accidents and injuries.
Here are some safety precautions to keep in mind when working with LED lights:
- Wear protective eyewear: LED lights produce bright light and can be harmful to the eyes if looked at directly. It is a good idea to wear protective eyewear, such as goggles or safety glasses, when working with LED lights to protect your eyes from exposure to bright light.
- Avoid moisture: Water and electricity do not mix, and it is important to keep LED lights dry to prevent the risk of electrical shock. If you are installing LED lights in a damp or humid environment, make sure to use water-resistant fixtures and take extra care to prevent moisture from coming into contact with the electrical components.
- Use caution when soldering: Soldering irons can reach high temperatures and can cause burns if handled improperly. When soldering LED lights, make sure to use a soldering iron with a low wattage and keep the tip clean to avoid any accidents.
- Follow the manufacturer’s instructions: LED lights come with installation instructions, and it is important to follow them closely to ensure that the lights are installed correctly and safely. Make sure to read the instructions carefully before starting your project and follow all the steps in the order specified.
By following these safety precautions, you can minimize the risk of accidents and injuries when working with LED lights and ensure that your DIY project goes smoothly.
Installation
Installing LED lights can seem intimidating at first, but with the right tools and knowledge, it is a relatively straightforward process. In this section, we will provide step-by-step instructions for installing LED lights in a variety of DIY projects.
Here are the general steps for installing LED lights:
- Gather all the necessary tools and materials. Make sure you have everything you need before starting the installation process to avoid any delays.
- Read the manufacturer’s instructions. Each type of LED light will have specific installation instructions, so it is important to read and understand them before starting the project.
- Prepare the installation area. Depending on the location of the LED lights, you may need to make some preparations, such as clearing away any clutter or moving furniture.
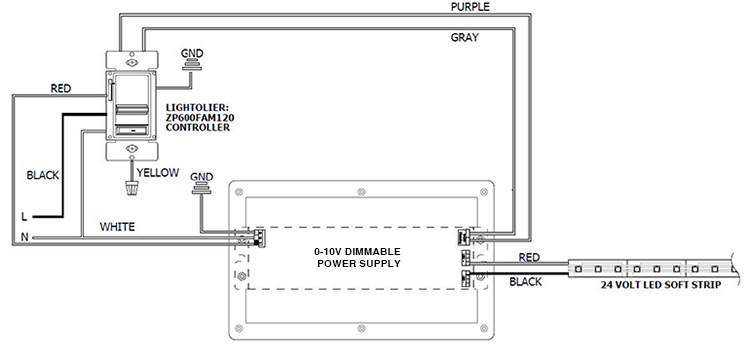
- Install the power supply. The power supply is what powers the LED lights and is typically located near the installation area. Follow the manufacturer’s instructions to install the power supply according to the specific requirements of your LED lights.
- Connect the LED lights. Once the power supply is installed, it’s time to connect the LED lights. Depending on the type of LED lights you are installing, you may need to solder the wires together or use wire nuts to make the connection. Follow the manufacturer’s instructions for the specific connection method required.
- Test the LED lights. Once the LED lights are connected, test them to make sure they are working properly. If everything is working as it should, proceed to the final step.
- Secure the LED lights in place. Depending on the type of LED lights you are installing, you may need to use mounting brackets or screws to secure them in place. Make sure to follow the manufacturer’s instructions and use caution when securing the lights to prevent any accidents or injuries.
By following these steps, you can install LED lights in a variety of DIY projects and create custom lighting effects in your home or business.
Maintenance and Upkeep
Installing LED lights is just the first step in the process of using them for DIY projects. Proper maintenance and upkeep are essential to ensure that the LED lights last as long as possible and continue to function properly.
Here are some tips for maintaining and prolonging the lifespan of LED lights:
- Follow the manufacturer’s recommendations: Each type of LED light will have specific recommendations for maintenance and upkeep. Make sure to follow these recommendations to ensure that the lights are being used and cared for properly.
- Clean the LED lights regularly: Dust and dirt can accumulate on LED lights over time, which can affect their performance. To keep the lights working properly, it is a good idea to clean them regularly using a dry cloth or duster.
- Replace damaged or broken lights: If an LED light is damaged or broken, it is important to replace it as soon as possible. Continuing to use a damaged or broken light can lead to further problems and potentially even cause accidents or injuries.
- Check for loose connections: Over time, connections between the LED lights and the power supply can become loose. To ensure that the lights are functioning properly, it is a good idea to check the connections periodically and tighten them if necessary.
By following these tips for maintenance and upkeep, you can ensure that your LED lights continue to work properly and last for as long as possible.
Conclusion: Using LED lights
In conclusion, LED lights are a versatile and energy-efficient choice for a variety of DIY projects. By following the steps outlined in this guide, you can successfully install and use LED lights in your own projects, creating custom lighting effects and adding ambiance to any space. By choosing the right LED lights, gathering the necessary tools and materials, taking safety precautions, and properly maintaining and caring for the lights, you can ensure that your LED lights are a success and last for as long as possible.
FAQs about DIY LED light projects
LED lights are a type of light source that use a small semiconductor to convert electricity into light. They are known for their energy efficiency, long lifespan, and versatility, and are commonly used for both residential and commercial lighting.
Some common tools and materials needed for a DIY LED light project include a soldering iron, wire stripper, heat shrink tubing, screwdriver, electrical tape, and wire nuts. You will also need the LED lights themselves and any other materials specific to your project, such as mounting brackets or power supplies.
LED lights are generally safe to use, but it is important to follow proper safety precautions when working with electrical components. Some safety precautions to keep in mind include wearing protective eyewear, avoiding moisture, using caution when soldering, and following the manufacturer’s instructions.
The process for installing LED lights will vary depending on the specific type of lights and the project you are working on. However, the general steps for installing LED lights include gathering the necessary tools and materials, reading the manufacturer’s instructions, preparing the installation area, installing the power supply, connecting the LED lights, testing the lights, and securing the lights in place.