- Introduction to DIY LED strip diffuser
- Materials needed for a DIY LED strip diffuser:
- Step-by-step instructions for creating a DIY LED strip diffuser:
- Tips and tricks for successful DIY LED strip diffuser installation:
- Conclusion: Enjoy the Benefits of Softer, More Even Lighting with a DIY LED Strip Diffuser
- FAQs about DIY LED strip diffuser
Introduction to DIY LED strip diffuser
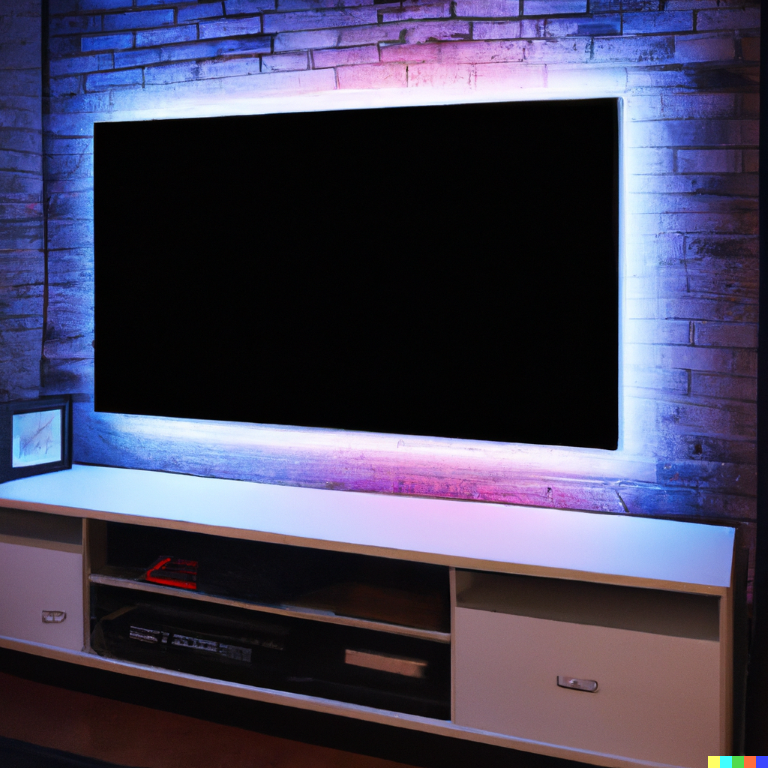
LED strip lights have become a popular choice for home lighting due to their versatility and energy efficiency. You can easily install them in a variety of locations, such as under cabinets, along crown molding, or behind TVs, and come in a range of colors and intensities to suit any mood or setting. However, one potential drawback of LED strip lights is the harsh, direct lighting they produce, which can be unflattering and uncomfortable to look at. A diffuser is a simple and effective solution to this problem, as it softens and spreads out the light, creating a more pleasant and even illumination.
While there are many commercial diffusers available for LED strip lights, a DIY LED strip diffuser is a budget-friendly and customizable option that allows you to tailor the diffuser to your specific needs and preferences. In this guide, we will walk you through the materials and steps needed to create your own LED strip diffuser at home. We will also provide tips and tricks for a successful installation, as well as address any potential challenges you may encounter along the way. By the end of this guide, you will have a better understanding of how to create and install a DIY LED strip diffuser, and be able to enjoy the benefits of softer, more even lighting in your home.
Materials needed for a DIY LED strip diffuser:
To create a DIY LED strip diffuser, you will need a few basic materials, most of which can be easily sourced from a hardware or craft store. The main component is a clear plastic sheet or frosted plastic film, which will be used to diffuse the light from the LED strip. Clear plastic sheets are typically made of acrylic or polycarbonate and have a high light transmittance, meaning that they allow most of the light to pass through. Frosted plastic film, on the other hand, is a matte finish material that scatters the light, creating a softer, more diffuse effect. You can use both types of plastic to create a LED strip diffuser, but the final result will differ depending on the material and thickness chosen.
In addition to the plastic sheet or film, you will also need scissors to cut it to size, as well as double-sided tape or another adhesive to attach it to the LED strip. Double-sided tape is a convenient and hassle-free option, as it is easy to apply and remove, and holds the plastic firmly in place. Other options for attaching the diffuser include glue, velcro strips, or mounting hardware, depending on the specific installation method and location of the LED strip.
Overall, the materials needed for a DIY LED strip diffuser are relatively simple and inexpensive, making it a cost-effective and easy-to-implement lighting solution. With the right materials and tools at hand, you can easily create and install a custom LED strip diffuser that meets your specific lighting needs.
Step-by-step instructions for creating a DIY LED strip diffuser:
Creating a DIY LED strip diffuser is a straightforward process that can be completed in a few simple steps. The exact process may vary depending on the specific materials and installation method you choose, but the general steps outlined below can be followed as a guide.
Measure and cut the plastic sheet or film to size.
The first step in creating a LED strip diffuser is to measure and cut the plastic to the appropriate size. Using a ruler or measuring tape, measure the length and width of the LED strip and add a few inches to each dimension to allow for overlap and margin. Cut the plastic using scissors or a sharp blade, taking care to make clean and straight cuts.
Attach the plastic
Attach the plastic o the LED strip using double-sided tape or another adhesive. Once you cut the plastic to size, it is time to attach it to the LED strip. If using double-sided tape, peel off the backing paper and apply a strip of tape along the back of the plastic. Alternatively, you can use another type of adhesive, such as glue or velcro strips, depending on your specific needs and preferences.
Optional
Drill holes and mount the diffuser. If you plan to mount the diffuser in a specific location or attach it to a surface, you may want to drill holes in the plastic and use screws or clips to secure it in place. This will ensure that the diffuser stays in place and does not move or shift over time.
Test the diffuser
Once the diffuser is attached to the LED strip, it is a good idea to test it out and make any necessary adjustments. Turn on the LED strip and observe the lighting to see if the diffuser is effectively diffusing the light. If the plastic sheet or film is too thick or too thin, or if the adhesive is not holding the diffuser securely in place, you may need to make some adjustments.
By following these simple steps, you can easily create a custom DIY LED strip diffuser that meets your specific lighting needs. With a little bit of creativity and effort, you can enjoy the benefits of softer, more even lighting in your home.
Tips and tricks for successful DIY LED strip diffuser installation:
Installing a DIY LED strip diffuser is a straightforward process, but there are a few tips and tricks that can help ensure a smooth and successful installation.
Measure and cut the plastic accurately.
One of the key factors in a successful LED strip diffuser installation is accurate cutting of the plastic sheet or film. It is important to measure and mark the plastic carefully, using a ruler or measuring tape, to ensure that it fits the LED strip properly and does not overlap or extend beyond the edges.
Apply the double-sided tape evenly.
If using double-sided tape to attach the diffuser to the LED strip, it is important to apply the tape evenly and smoothly, without any gaps or overlaps. This will ensure that the diffuser stays in place and does not come loose over time.
Test the diffuser before fully installing it.
Before fully installing the diffuser, it is a good idea to test it out and make any necessary adjustments. Turn on the LED strip and observe the lighting to see if the diffuser is effectively diffusing the light. If the plastic sheet or film is too thick or too thin, or if the adhesive is not holding the diffuser securely in place, you may need to make some adjustments before fully installing it.
Use mounting hardware if necessary.
If you are installing the LED strip in a specific location or attaching it to a surface, you may want to consider using mounting hardware to secure the diffuser in place. This can include screws, clips, or velcro strips, depending on the specific installation method and the type of surface you are attaching the diffuser to.
By following these tips and tricks, you can ensure a successful and hassle-free installation of your DIY LED strip diffuser. With a little bit of planning and attention to detail, you can enjoy the benefits of softer, more even lighting in your home.
Conclusion: Enjoy the Benefits of Softer, More Even Lighting with a DIY LED Strip Diffuser
A DIY LED strip diffuser is a simple and effective way to soften and diffuse the harsh, direct lighting produced by LED strip lights. By attaching a clear plastic sheet or frosted plastic film to the LED strip, you can create a more pleasant and even illumination that is easier on the eyes and more suitable for a variety of settings.
Creating and installing a DIY LED strip diffuser is an affordable and customizable solution that allows you to tailor the diffuser to your specific needs and preferences. With the right materials and tools, you can easily create a custom diffuser that meets your specific lighting needs.
In addition to the cost and customization advantages of a DIY approach, using a LED strip diffuser also has other benefits, such as reducing glare and shadows, and creating a more cohesive and cohesive lighting design. By following the steps and tips outlined in this guide, you can easily create and install a DIY LED strip diffuser and enjoy the benefits of softer, more even lighting in your home. So, it is a good idea to try creating your own LED strip diffuser and share any tips or experiences you may have.
FAQs about DIY LED strip diffuser
A LED strip diffuser is a simple device that is used to soften and diffuse the harsh, direct lighting produced by LED strip lights. It is typically made of a clear plastic sheet or frosted plastic film that is attached to the LED strip and spreads out the light, creating a more even and pleasant illumination.
There are several reasons why you may want to use a LED strip diffuser. One of the main benefits is that it creates softer and more even lighting, which is easier on the eyes and more suitable for a variety of settings.
Yes, you can easily make a LED strip diffuser yourself using a clear plastic sheet or frosted plastic film, scissors, and double-sided tape or another adhesive. By following a few simple steps, you can create a custom LED strip diffuser that meets your specific lighting needs and preferences.
To make a LED strip diffuser, you will need a clear plastic sheet or frosted plastic film, scissors, and double-sided tape or another adhesive. You may also need additional materials depending on the specific design or installation method, such as a drill or mounting hardware.
To attach a LED strip diffuser to your LED strip lights, you can use double-sided tape or another adhesive. Simply cut the plastic sheet or film to size, apply a strip of double-sided tape to the back of the plastic, and attach it to the LED strip.