Introduction to getting fonts in photoshop
Photoshop is a powerful graphic design software that allows users to create and edit images, graphics, and text. One important aspect of design in Photoshop is the use of fonts, which are the styles and types of text used in a design. The right font can add visual appeal and personality to a design, while the wrong font can ruin the entire look. That’s why it’s important to know how to get fonts in Photoshop and how to use them effectively.
In this tutorial, we’ll cover the steps for how to get fonts in Photoshop and how to access and use them in your designs. We’ll start by explaining how to install fonts on your computer, so they can be used in Photoshop. Then, we’ll go over how to access and use fonts in Photoshop, including the built-in font library and external fonts. Along the way, we’ll also share some tips and tricks for working with fonts in Photoshop, such as how to preview and compare different fonts, how to change the font size, color, and style, and how to add effects to fonts.
Whether you’re a beginner or an experienced Photoshop user, this tutorial will provide you with the knowledge and skills you need to confidently use fonts in your designs. So let’s get started!
How to Install Fonts on Your Computer:
Before you can use fonts in Photoshop, you need to install them on your computer. Here’s how to do it:
- Locate the font file on your computer or online. Font files typically have the extension .ttf (TrueType Font) or .otf (OpenType Font). Some fonts may need to be purchased or require a license to use, while others are free to download.
- Download the font file to your computer. If you’re downloading the font from an online source, make sure to save it to a location where you can easily access it, such as your desktop or downloads folder.
- Open the font file. On a Windows computer, double-click the font file to open it. On a Mac, click the font file and then click “Install Font”.
- Install the font. On a Windows computer, a window will pop up showing a preview of the font. Click “Install” to install the font. On a Mac, the font will automatically be installed and added to your font library.
- Test the font. Once the font is installed, you can test it by opening a program like Microsoft Word or Photoshop and selecting the font from the font drop-down menu. If the font appears in the menu and can be selected, it has been successfully installed.
It’s important to note that some fonts may not work on all computers, particularly older computers or those with limited font support. If you’re having trouble installing a font or it doesn’t appear to be working, try searching online for solutions or contact the font creator for assistance.
Installing fonts on your computer may seem like a small step, but it’s an important one for using fonts in Photoshop and other design programs. Now that you know how to install fonts, let’s move on to accessing and using them in Photoshop.
How to Access and Use Fonts in Photoshop:
Once fonts are installed on your computer, they can be accessed and used in Photoshop. Here’s how to do it:
- Open Photoshop and create a new document or open an existing one.
- Select the “Type” tool from the toolbar on the left side of the screen. This tool allows you to add and edit text in Photoshop.
- Click anywhere on the canvas to create a new text layer. A blinking cursor will appear, indicating that you can type.
- Type the text you want to use. As you type, you’ll see the text appear on the canvas.
- Select the text you want to format. To select the text, click and drag your cursor over it or use the “Type” tool to click on a specific word or phrase.
- Access the font options. With the text selected, you’ll see the font options appear in the Properties panel on the right side of the screen. If the Properties panel is not visible, you can access it by going to “Window” in the top menu and selecting “Properties”.
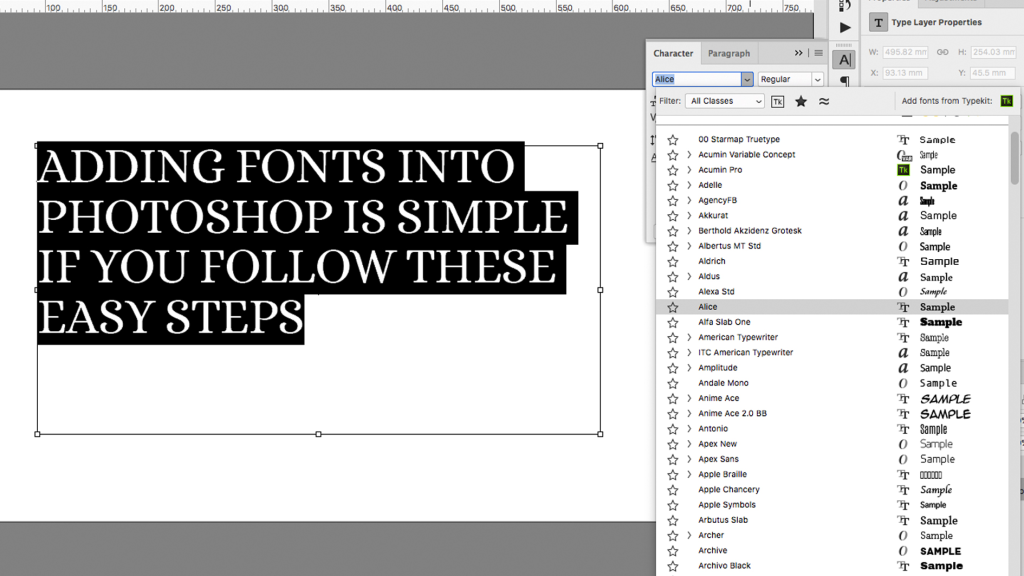
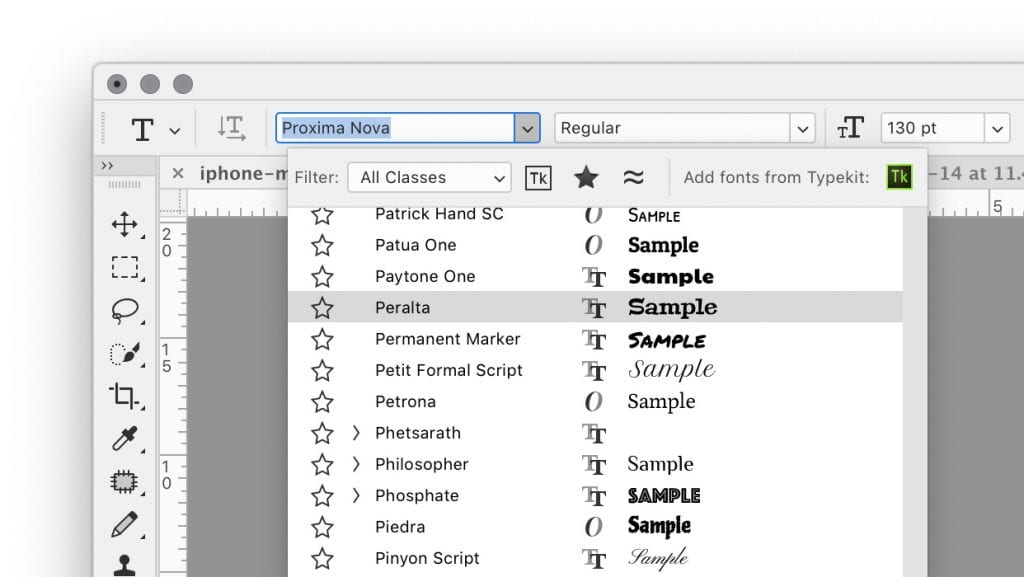
- Choose a font. In the Properties panel, you’ll see a drop-down menu labeled “Font”. Click on this menu to access the available fonts. You’ll see a list of all the fonts installed on your computer, as well as any external fonts you’ve added to Photoshop. Simply click on the font you want to use to apply it to the selected text.
- Edit the font options. In the Properties panel, you’ll also see options for changing the font size, color, and style (such as bold or italic). Simply click on the options you want to use and the changes will be applied to the selected text.
That’s all there is to it! With these steps, you should now know how to access and use fonts in Photoshop. As you experiment with different fonts and options, you’ll start to get a feel for what works best for your designs. Just remember to always consider the readability and legibility of your text when choosing a font, as well as the overall aesthetic of the design.
Tips and Tricks for Working with Fonts in Photoshop:
Now that you know how to access and use fonts in Photoshop, here are some tips and tricks for working with them more effectively:
- Preview and compare different fonts. Photoshop has a built-in font preview feature that allows you to quickly see how different fonts look on your text. To access this feature, select the text you want to format and then click on the font drop-down menu in the Properties panel. As you hover over each font, you’ll see a live preview of how the font looks on the text. This can be a helpful way to compare different fonts and see which one works best for your design.
- Change the font size, color, and style. In the Properties panel, you’ll see options for changing the font size, color, and style. Simply click on the options you want to use and the changes will be applied to the selected text. You can also use the “Type” tool to highlight specific words or phrases and apply different font options to them.
- Add effects to fonts. Photoshop has a variety of effects that can be applied to fonts, such as outlines, drop shadows, and glows. To access these effects, select the text you want to format and then click on the “fx” icon in the Properties panel. From there, you can choose from a variety of effects and customize their settings to achieve the desired result.
- Align and justify text. In the Properties panel, you’ll see options for aligning and justifying text. These options allow you to adjust the alignment of your text within a text box or on the canvas. Simply click on the options you want to use and the changes will be applied to the selected text.
By following these tips and tricks, you’ll be well on your way to mastering the use of fonts in Photoshop. Just remember to always consider the readability and legibility of your text when choosing and formatting fonts, as well as the overall aesthetic of the design.
Conclusion: Mastering the Use of Fonts in Photoshop
In this tutorial, we covered the steps for how to get fonts in Photoshop and how to access and use them in your designs. We started by explaining how to install fonts on your computer, so they can be used in Photoshop. Then, we went over how to access and use fonts in Photoshop, including the built-in font library and external fonts. Along the way, we also shared some tips and tricks for working with fonts in Photoshop, such as how to preview and compare different fonts, how to change the font size, color, and style, and how to add effects to fonts.
By following these steps and tips, you should now have a solid understanding of how to get fonts in Photoshop and how to use them effectively in your designs. Don’t be afraid to experiment with different fonts and play around with the various font options available in Photoshop. The more you practice, the more confident you’ll become in using fonts to enhance your designs.
So go ahead and get started with your font experimentation in Photoshop! Who knows what creative and eye-catching designs you’ll come up with.
FAQs about getting fonts in photoshop
To get fonts in Photoshop, you first need to install them on your computer. Once they are installed, you can access and use them in Photoshop by selecting the “Type” tool and choosing the font from the font drop-down menu in the Properties panel.
Not all fonts can be used in Photoshop. Some fonts may be incompatible with the software or require a license to use. To ensure that a font is compatible with Photoshop, it’s best to download it from a reputable source or check with the font creator for usage guidelines.
To preview and compare different fonts in Photoshop, select the text you want to format and then click on the font drop-down menu in the Properties panel. As you hover over each font, you’ll see a live preview of how the font looks on the text. This can be a helpful way to compare different fonts and see which one works best for your design.
To change the font size, color, and style in Photoshop, select the text you want to format and then use the options in the Properties panel. You can also use the “Type” tool to highlight specific words or phrases and apply different font options to them.
To add effects to fonts in Photoshop, select the text you want to format and then click on the “fx” icon in the Properties panel. From there, you can choose from a variety of effects and customize their settings to achieve the desired result.